Initial Setup
Preliminary Steps
If you purchased a Training Village from us, the system arrives fully pre-assembled. However, should you ever need to assemble or adjust any components yourself, the process is straightforward and only requires an Allen key and a screwdriver. The setup can be easily managed by following these instructions.
We provide the Raspberry Pi along with an SD card that contains both the operating system (Raspberry Pi OS) and all required software pre-installed.
Build-It-Yourself
If you prefer to build the Training Village yourself, start by reviewing the complete list of required parts and the plans for all 3D-printable pieces here. Once you have your own Raspberry Pi, you can either download an image of the SD card to copy onto your device or install everything from scratch.
Hardware Connections & First Boot
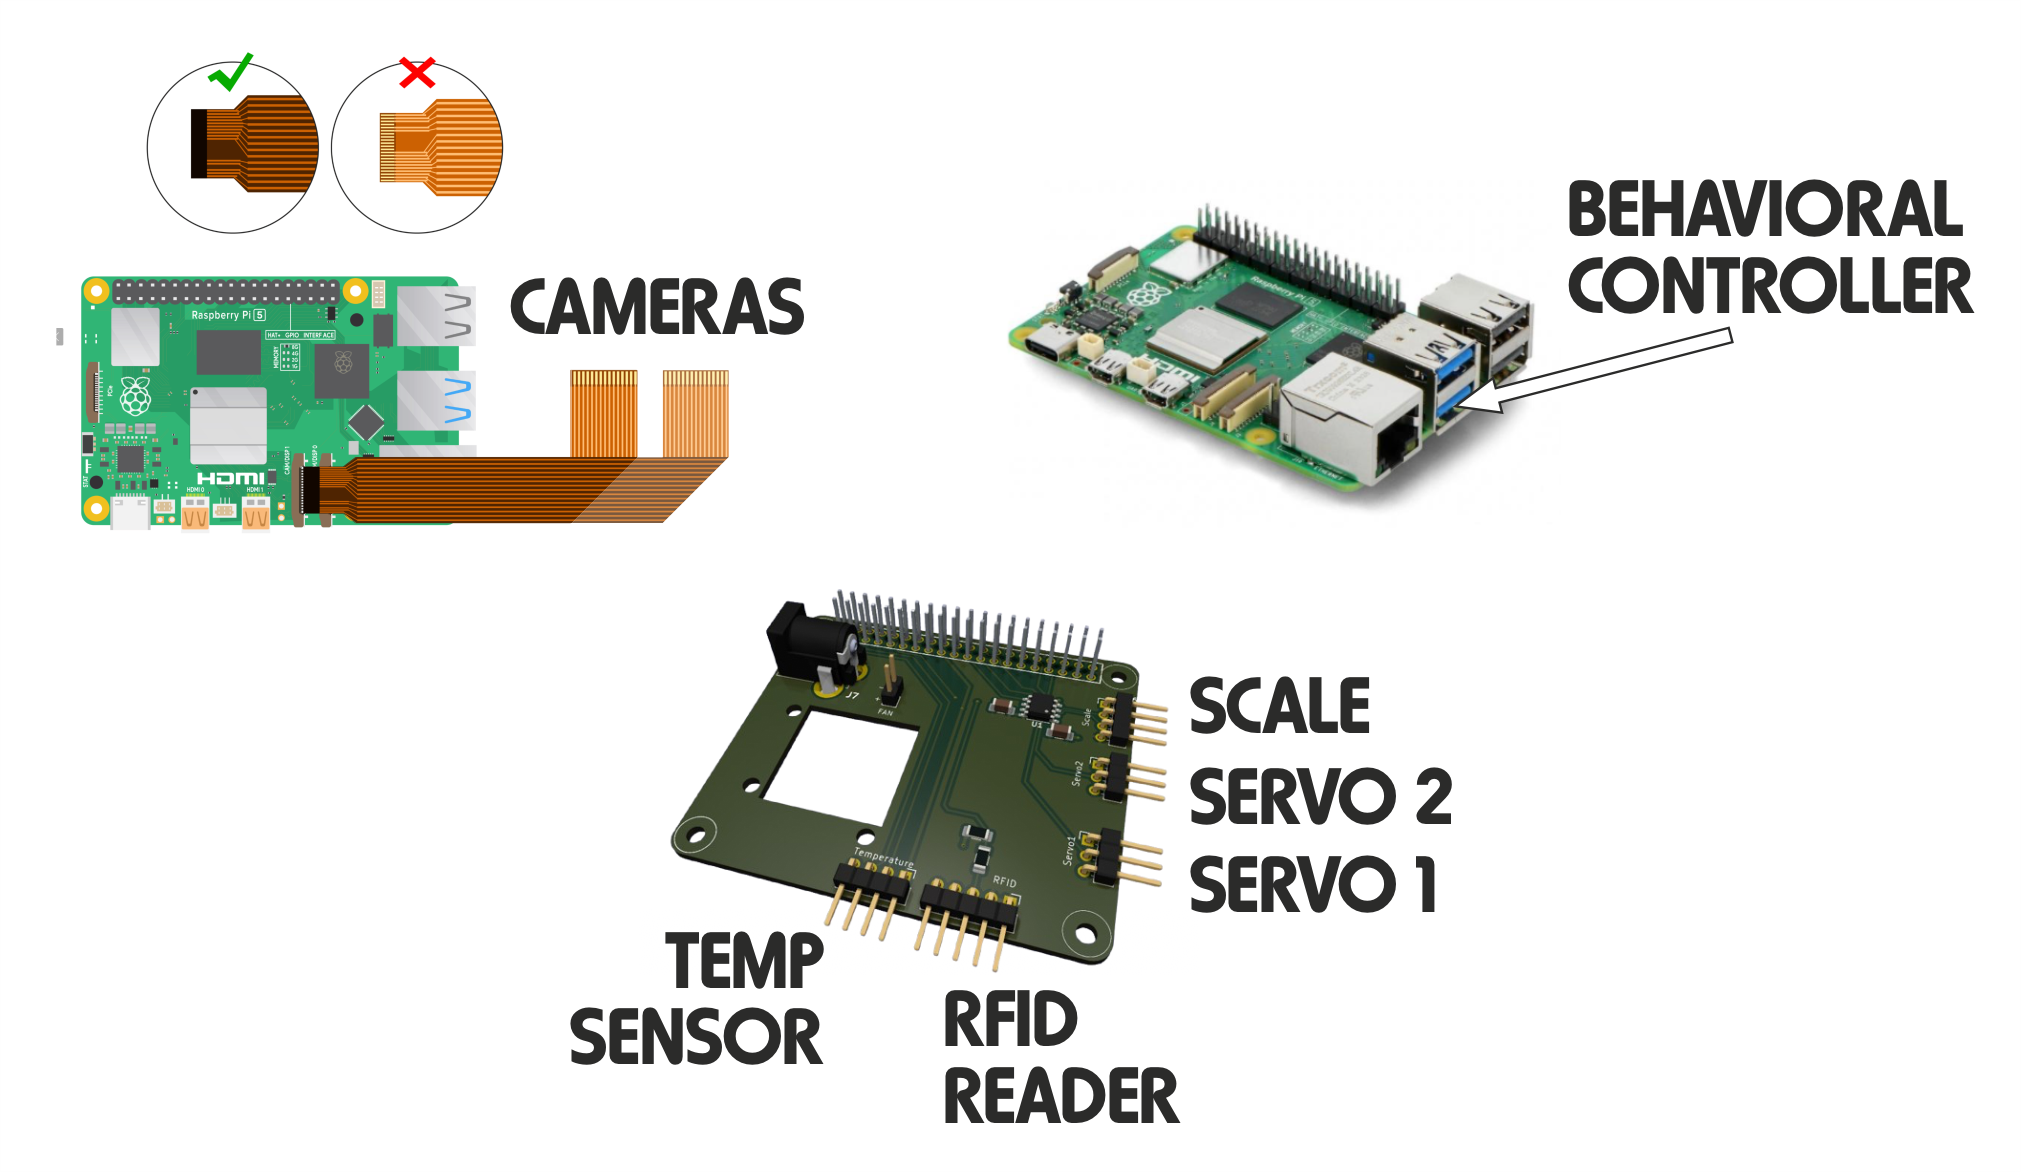
Connect the Corridor Board to the Raspberry Pi assembly using a standard Ethernet cable. It is vital to plug this into the correct port, as the Main HAT features two distinct Ethernet ports: one labeled Corridor and one labeled Box. If your configuration utilizes the Box Board (for operant box lighting or other peripherals), connect it to the “Box” port at this time.
If your experimental paradigm integrates a Bpod (or any other external behavioral controller), connect its USB cable to the bottom USB 3.0 port (the blue port closest to the Raspberry Pi’s native Ethernet jack).
Connect your dedicated 5V, 3A power supply directly to the power input barrel jack located on the Main HAT. Using a 3A power source is mandatory to ensure there is enough current to reliably power all visible and IR illumination LEDs simultaneously.
To complete the initial setup, configure the internet connection, and enable remote management, you will temporarily need local access to the system. The easiest way to do this is to connect a keyboard, mouse, monitor (via micro-HDMI), and a local network cable (if using a wired connection) to the Raspberry Pi before plugging it into a power outlet.
Once these peripherals are secure, connect the main power supply to the USB-C connector; the Raspberry Pi 5 will boot up automatically.
Setting Up the OS:
Go to
Preferences->Control Centreand select the tabLocalisation.Configure your country, timezone, keyboard layout, and language preferences.
Go to
Preferences->Control Centreand select the tabSystem.Update the system credentials when prompted. By default, the pre-configured system image uses:
Username:
piPassword:
training_village
Leave the username as
pi, but change the password to a secure one of your choice.